How to create and send an email campaign
A step-by-step guide to writing, designing, choosing recipients, and sending your first email campaign in TinyCourier.
A campaign is a single email you send to a group of people, like a newsletter or an announcement. Here’s how to make one.
Step 1: Start a new campaign
Go to Campaigns → New campaign.
Step 2: Design your email
Use the editor to write and style your email. You can:
- Add text, images, buttons, and links.
- Drag pieces around to build your layout.
- Drop in merge tags to personalize each email (like the subscriber’s first name). See Personalize with merge tags.
Take your time. Your work saves automatically as you go.
Step 3: Send yourself a test
Before anyone else sees it, send a test to your own inbox. Look for typos, check the links, and see how it looks on your phone. You can test as many times as you like.
Step 4: Review and send
When you’re happy, click Send to reach the review screen. This is your final checklist:
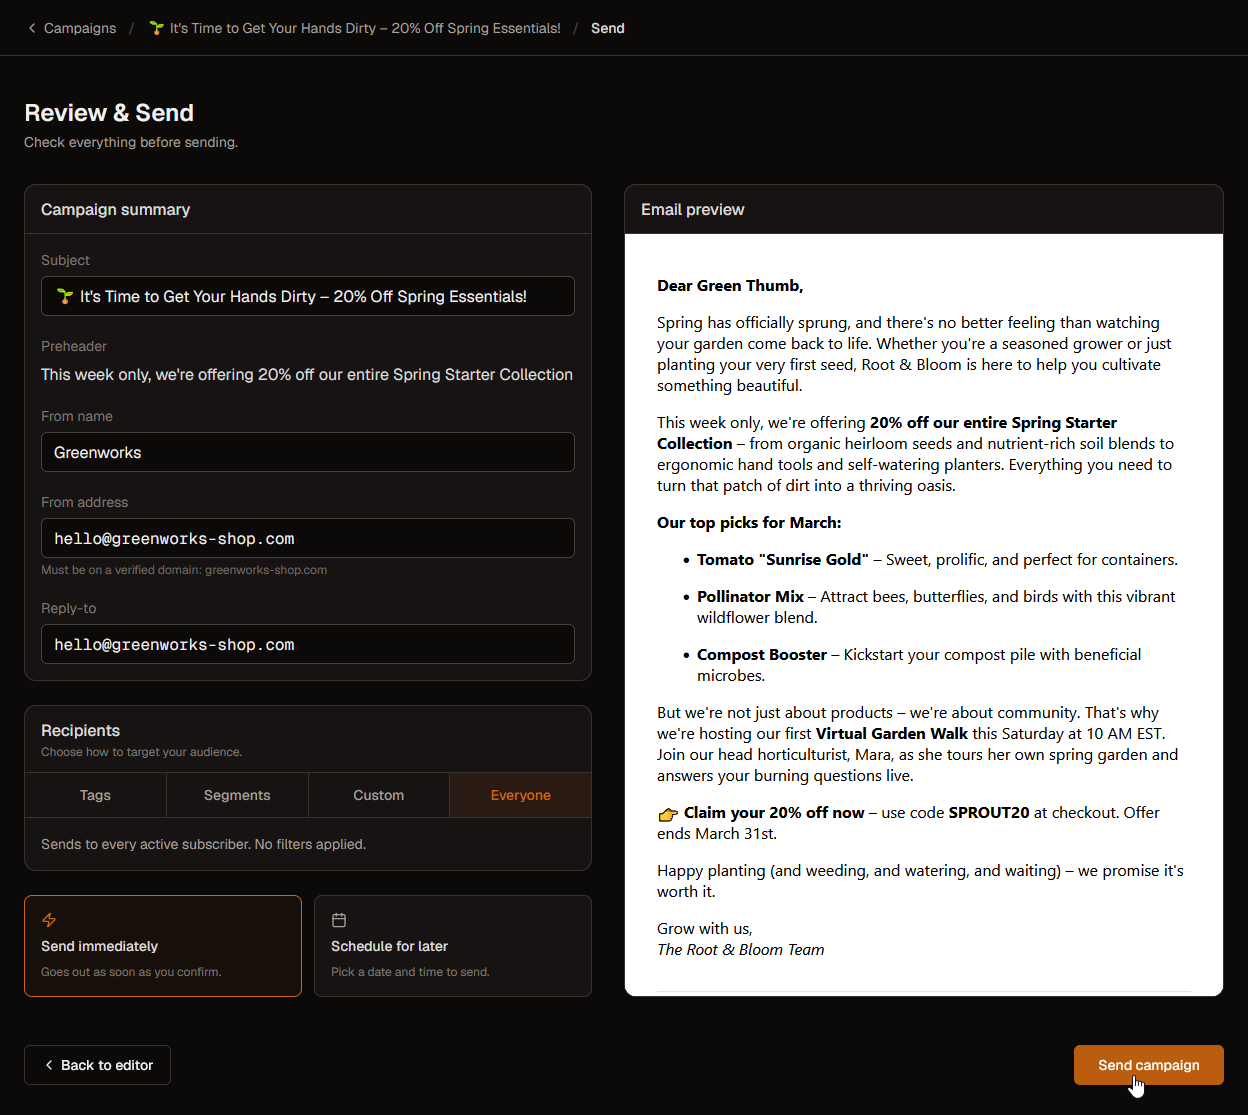
- Subject line: the first thing people see. Make it count.
- From name and address: who it’s coming from. The address must be on a verified domain.
- Recipients: choose who gets it: by tag, a saved segment, a custom rule, or everyone. See Tags and segments.
- Timing: send now, or schedule it for a date and time.
TinyCourier flags anything that needs fixing (like an empty subject) before it’ll let you send, so you can’t make an obvious mistake.
Step 5: Hit send
Click Send campaign (or Schedule campaign). That’s it! 🎉
What if I see warnings?
- “Issues to fix”: these must be fixed before sending (e.g. no subject, unverified address, account not yet approved).
- Spam score warnings: suggestions to help you avoid the spam folder. They don’t block you.
- Audience health warning: if your list has many “dead” addresses (no activity in over a year), we’ll suggest cleaning it first. This protects your reputation. See Why emails bounce.
After sending
Head to the campaign’s Stats to see opens, clicks, and more. See Understand your campaign stats.