How to verify your sending domain (DNS setup)
A simple, step-by-step guide to authenticating your domain in TinyCourier with DKIM, SPF, and DMARC DNS records so your emails reach the inbox.
This is the most technical step, but don’t worry. We’ll walk through it slowly, and you only do it once.
Why this matters
To send email from your own address (like hello@yourcompany.com), inbox providers like Gmail and Outlook need proof that you gave us permission. You give that proof by adding a few small records to your domain. Once that’s done, your emails are trusted and far more likely to land in the inbox instead of spam.
The records are called DKIM, SPF, and DMARC. You don’t need to understand them. You just need to copy and paste them.
What you’ll need
- Access to wherever you bought your domain (GoDaddy, Namecheap, Cloudflare, Google Domains, etc.). This is where your DNS settings live.
- About 10 minutes.
Step 1: Add your domain in TinyCourier
Go to Settings → Sending → Domains, type your domain (like yourcompany.com), and click Add domain.
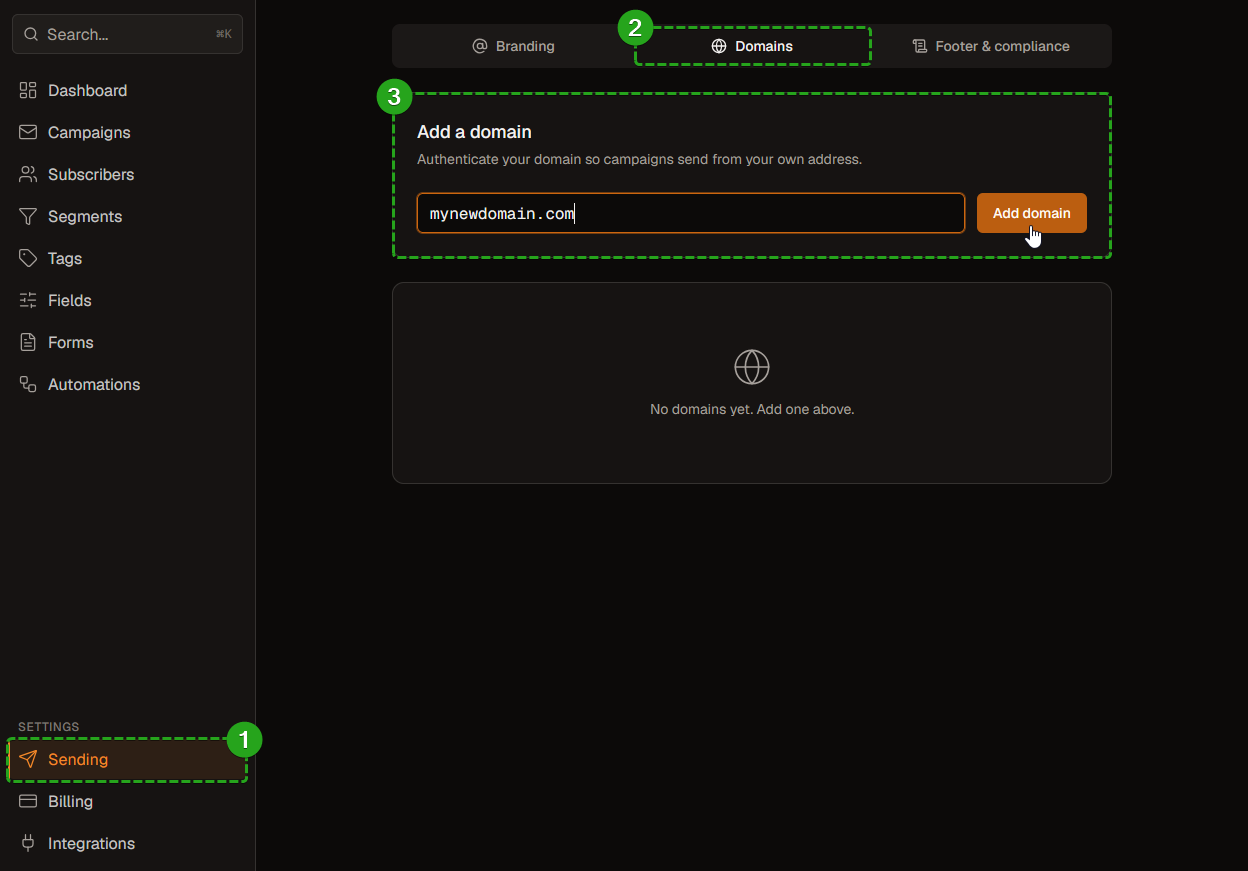
Step 2: Open the records we give you
Click your domain in the list to expand it. You’ll see a table of records, each with a Type, a Host, and a Value. There’s a copy button next to every one.
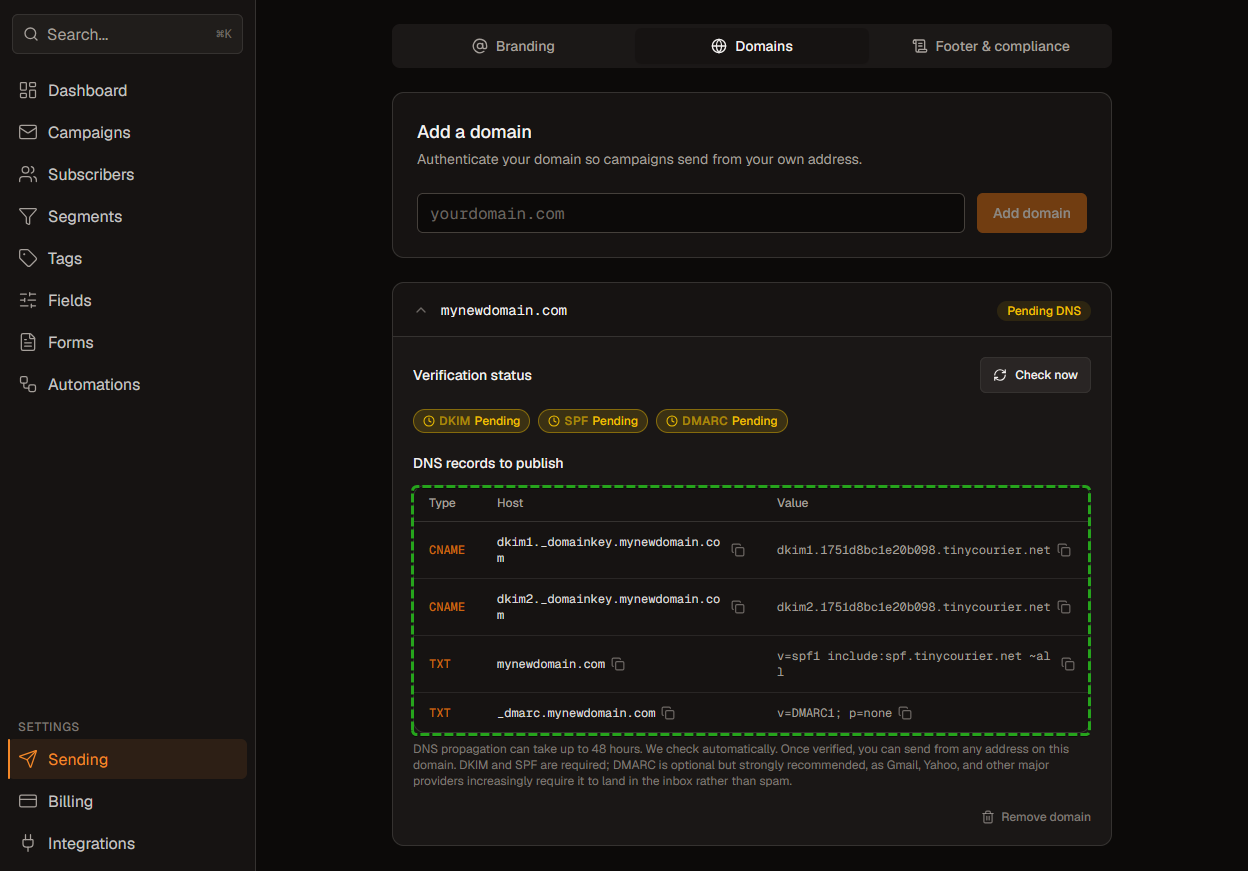
Keep this tab open. You’ll copy from here.
Step 3: Paste them into your domain provider
In a new tab, log in to your domain provider and find the DNS section (sometimes called “DNS settings,” “DNS management,” or “Records”).
For each row in the TinyCourier table, create a new record at your provider:
- Pick the Type (CNAME, or TXT) to match.
- Copy the Host value from TinyCourier and paste it into the “Host” or “Name” box.
- Copy the Value from TinyCourier and paste it into the “Value,” “Content,” or “Points to” box.
- Save.
Repeat until every row from TinyCourier exists at your provider.
Tip: Use the copy buttons. A single extra space or missing letter will stop a record from verifying.
Step 4: Wait for the green check
DNS changes can take a few minutes, and occasionally up to 48 hours, to spread across the internet. TinyCourier checks automatically, but you can press Check now anytime.
When everything is good, you’ll see Verified badges:
- DKIM – Verified ✅
- SPF – Verified ✅
- DMARC (optional, but we strongly recommend it)
That’s it. You can now send from any address on this domain.
Common questions
Which provider am I using? It’s wherever you bought the domain. If you’re not sure, search your email for a receipt from your domain purchase.
It still says “Pending” after an hour. That’s normal. DNS can be slow. Check again later. If it’s been over a day, double-check that you copied each Host and Value exactly, with no extra spaces.
What’s DMARC and do I need it? DMARC is an extra layer of trust. It’s optional, but Gmail, Yahoo, and others increasingly reward senders who have it with better inbox placement. We recommend adding it.
Can someone do this for me? Yes. You can forward the records table to your web person or IT helper. The instructions above are all they need.