Using the API and creating API keys
Connect your own tools to TinyCourier with the API. How to create an API key, keep it safe, set permissions, and where to find the full reference.
Want to connect TinyCourier to your own website, app, or tools? The API lets you add subscribers, manage your list, and more, automatically. This page gets you started. (If you’re not a developer, you can safely skip it.)
What you can do with the API
- Add and update subscribers from your own site or app.
- Manage tags, fields, and segments.
- Trigger and track sends.
- Receive webhooks, real-time notifications when things happen (a new subscriber, a bounce, etc.).
Creating an API key
An API key is like a password that lets another tool act on your account.
- Go to API keys → New key.
- Give it a name you’ll recognize (e.g. “Website signup”).
- Choose its permissions (scopes), only grant what that tool actually needs.
- Copy the key and store it somewhere safe.
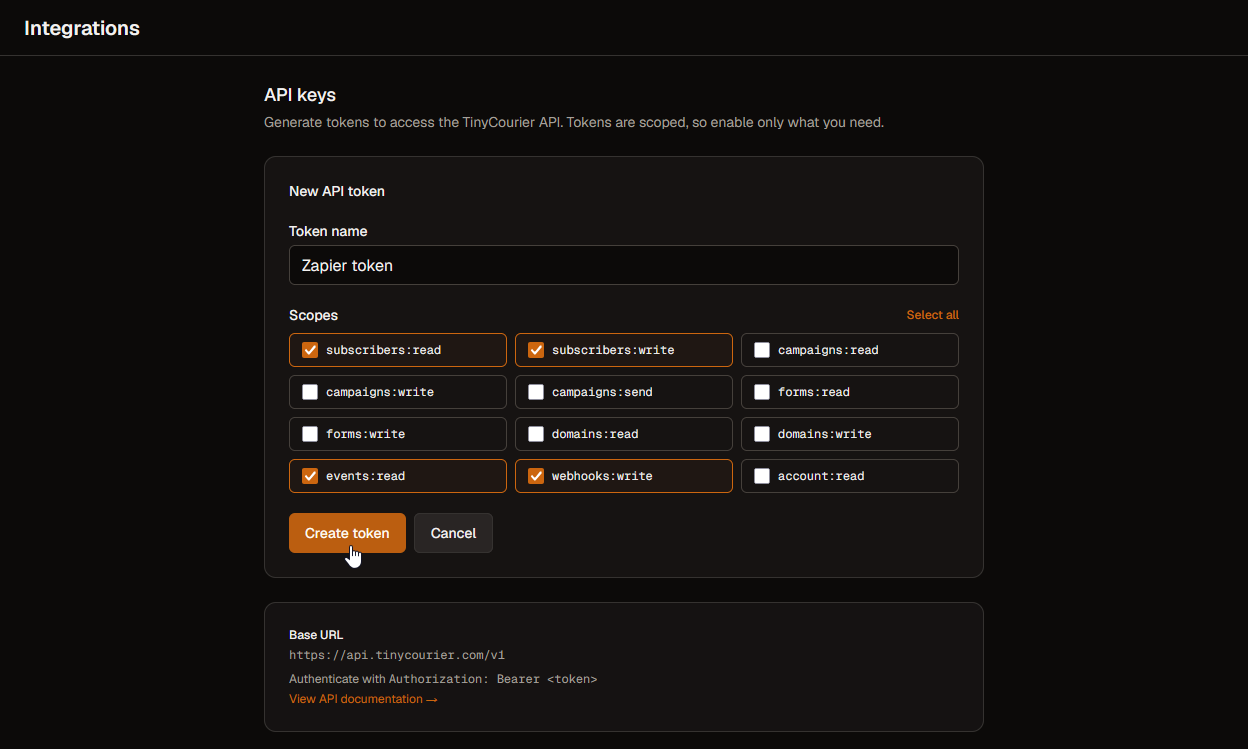
Important: the key is shown once, at creation. Copy it right away. If you lose it, just delete it and make a new one.
Keep your keys safe
- Never put a key in public code, a webpage, or a shared doc.
- Give each tool its own key, so you can revoke one without affecting the others.
- Use the narrowest scopes that get the job done. A form that only adds subscribers doesn’t need permission to delete them.
- Delete keys you no longer use. You can see when each key was last used on the API keys page.
The full reference
Every endpoint, with examples, lives in the interactive API docs:
👉 api.tinycourier.com/docs (also linked from inside your account)
There you’ll find request formats, response shapes, and how to authenticate using your key.
No-code option
Not ready to write code? Many tools (like Zapier-style automation platforms) can talk to the API for you using your key, no programming required.